
How do I set up secure mail in my Outlook using key cards?
Load NemID employee signature with key card
You must install the NemID extension program if you use key cards and would like to use the NemID employee signature for secure email. The program can be downloaded her:
In order to send / receive secure mail with NemID with a key card, the certificate must be retrieved and loaded. This is done using NemID.
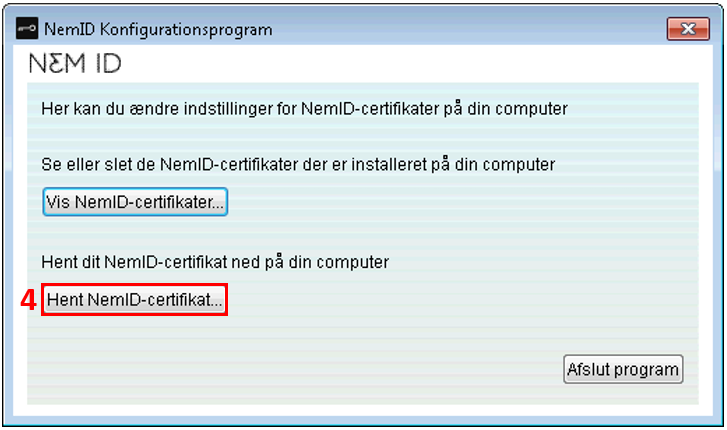
Press Start Select All Programs. Roll out program group NemID and the subgroup NemID Udvidelsesprogram . You must then choose NemID Konfigurationsprogram (3).

Press Hent NemID-certifikat… (4)
fill out User name (5) and Password (6) and press Hent certifikat (7).

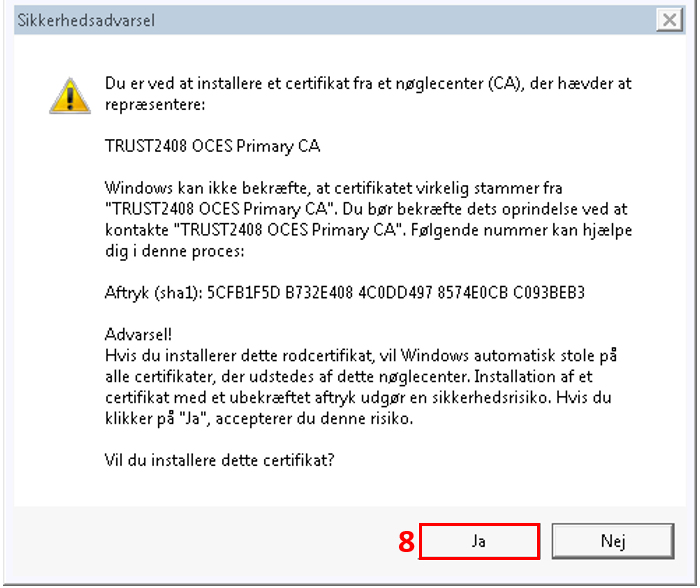
Press Yes to the security alert (8).
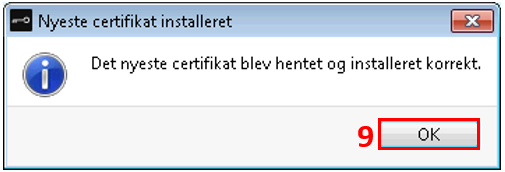
Press OK (9).
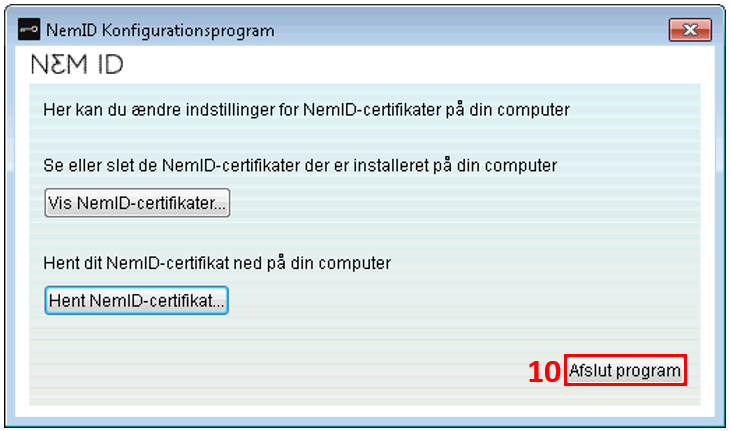
Press Afslut program (10).
Start Microsoft Outlook 2010. Press File (11) at the top menu. Select Settings (12).

Choose the point Trust Center (13) at the menu to the left. Then select Trust Center Settings (14) as shown in the picture:
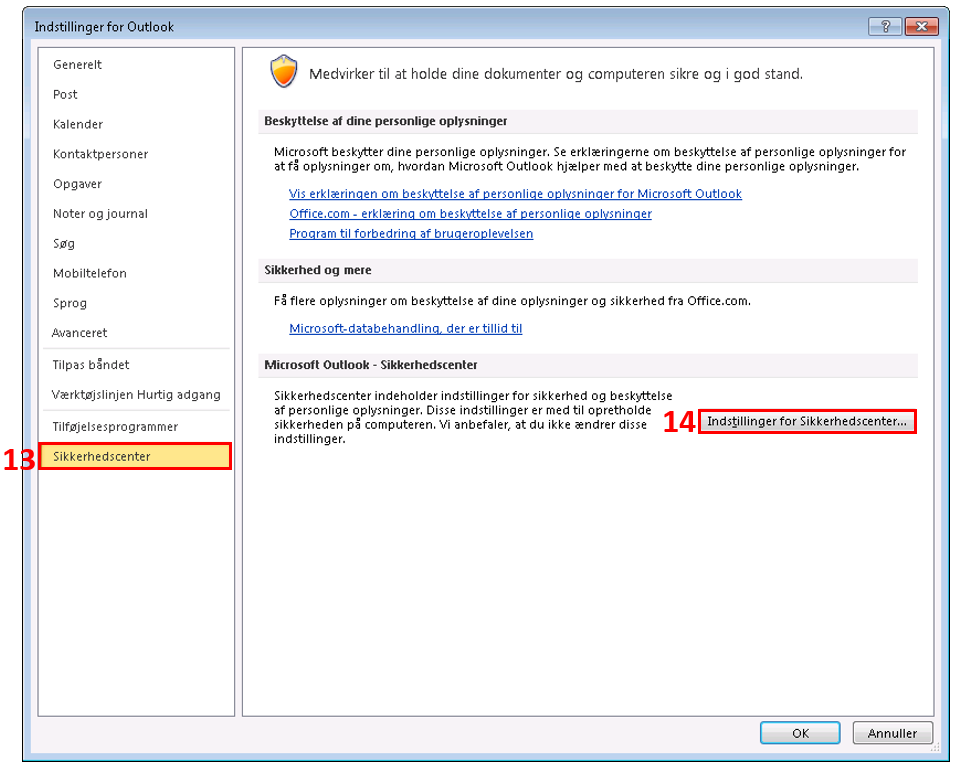
Choose the point Email security (15) at the menu to the left. Then select Settings (16).
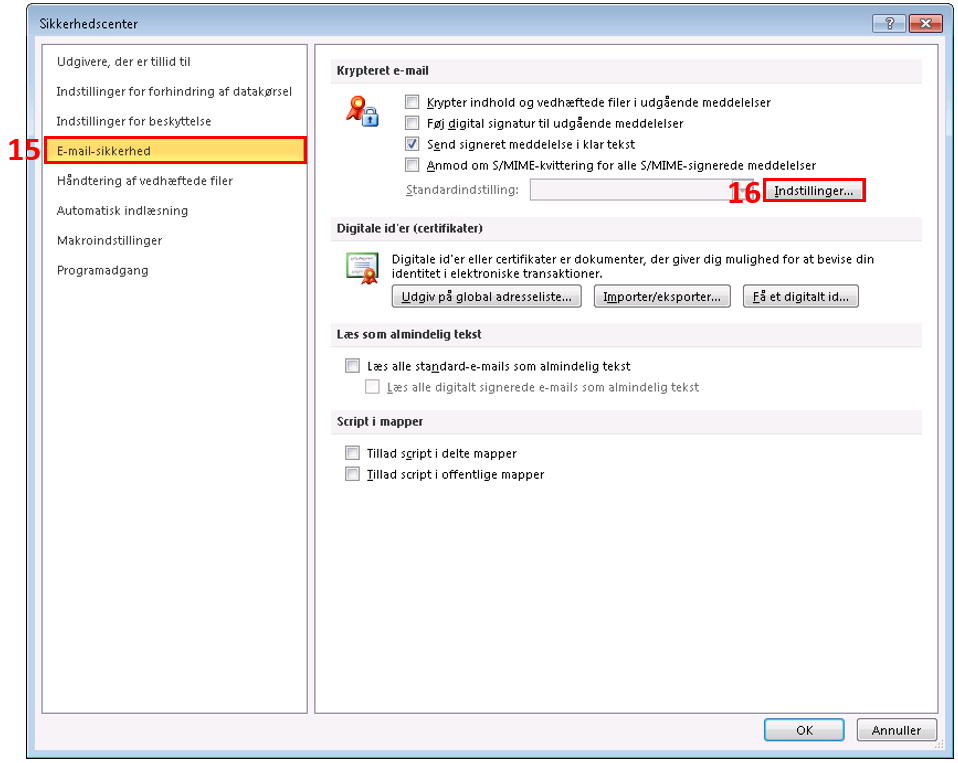
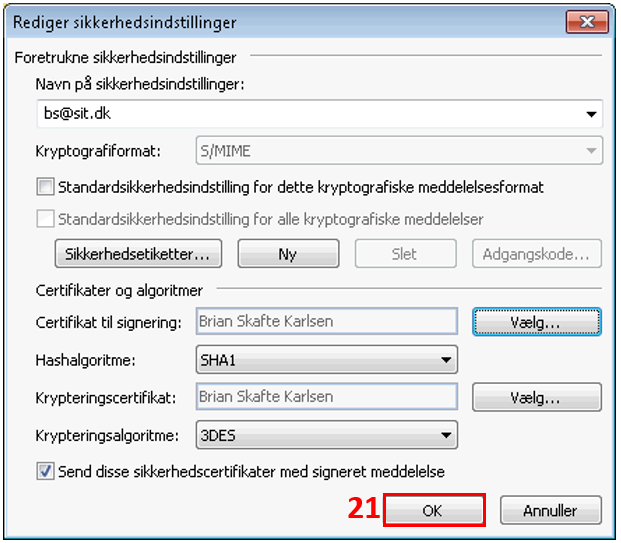
You must now select a certificate for signing and a certificate for encryption.
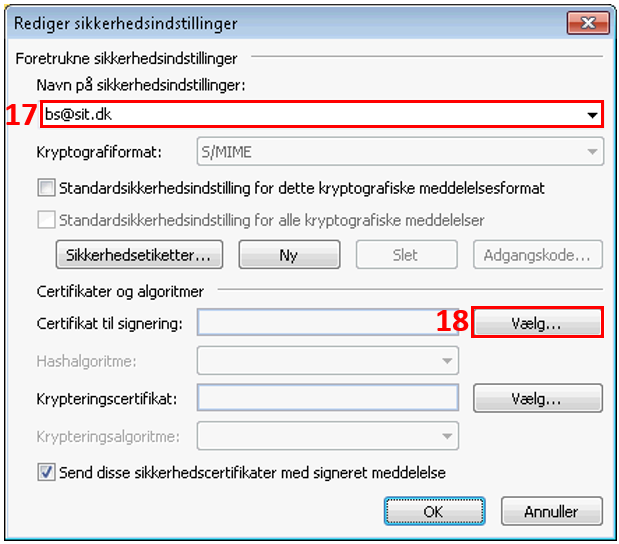
fill out Security Settings Nema (17) and press Choose (18) to view the list of available certificates.
Select the certificate to use
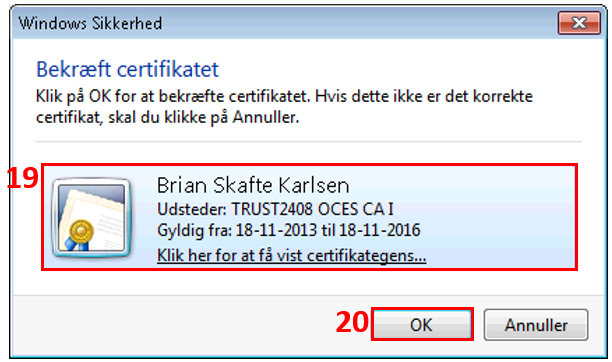
There may be one or more certificates to choose from. You will typically need to use the certificate with your full name and the latest expiration date. (19) click OK (20).
By default, Outlook will automatically select the same certificate for both purposes. OK (21).
Press OK until you are back in your inbox.
You are now ready to use secure email in Microsoft Outlook 2010.
Here's how to save the recipient's certificate to your address book
Press File (22), select Account Settings (23) and select Account Settings... (24)

Select the tab Address books (15). Then press New... (16) to associate a new directory.

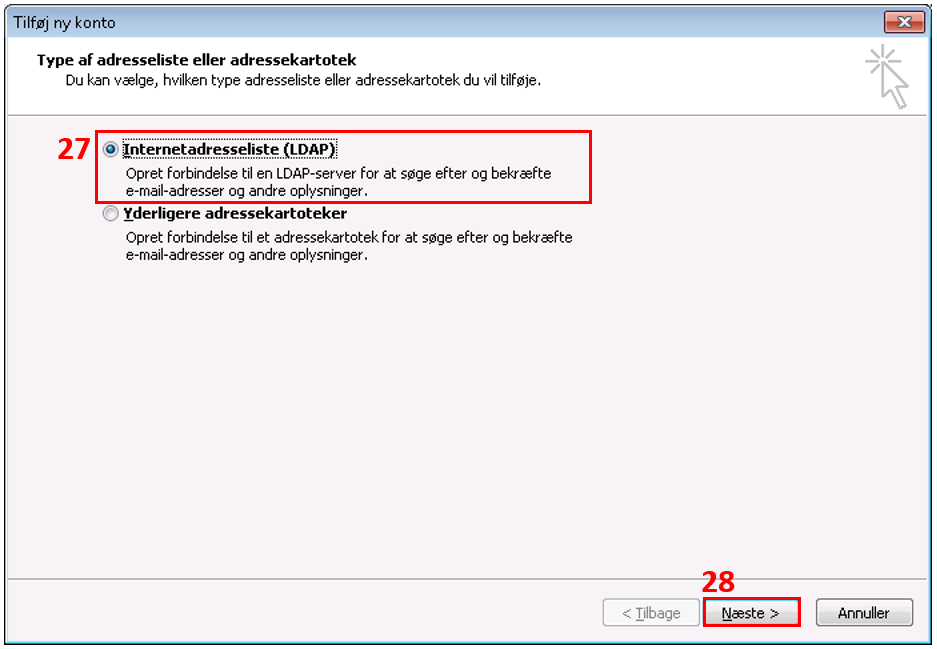
Leave the selection in Internet Directory Service (LDAP) (27) Select Next (28).
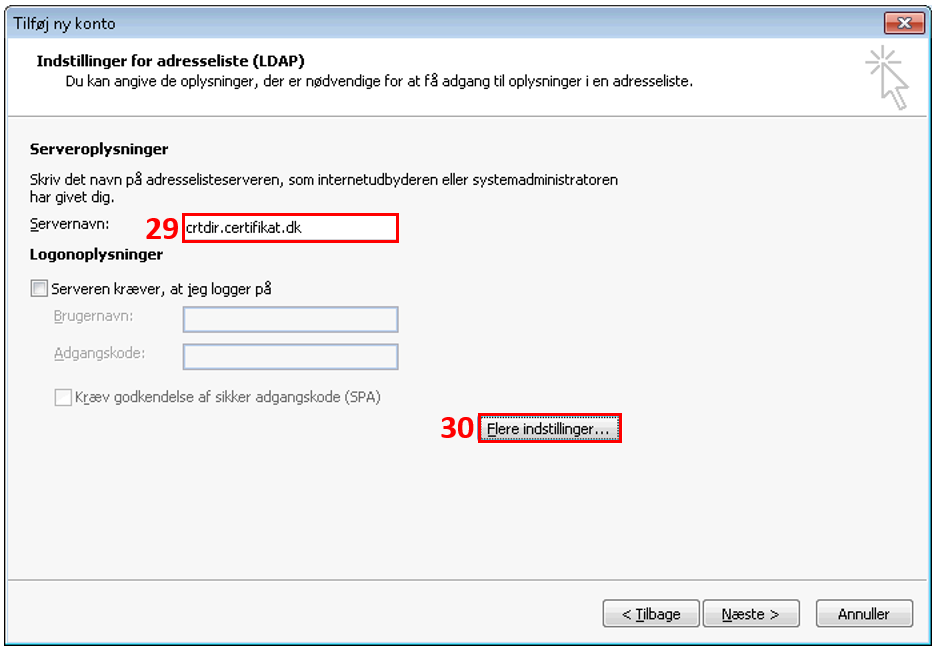
In the field Server Name skriver du servernavnet på Nets’ adresseliste: crtdir.certifikat.dk (19) without http or www. Then press More Settings ... (30).
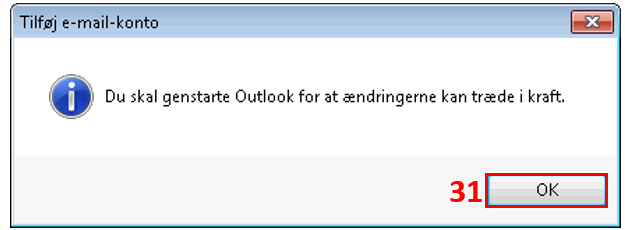
Press OK (31).
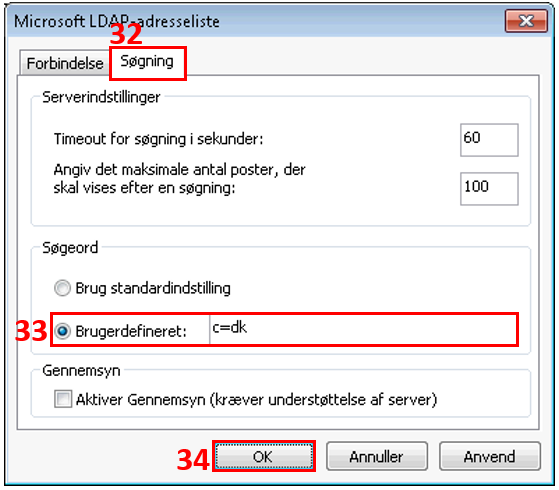
Now tap on the tab Search (32). You must check the box Custom (33) and then enter c=dk as shown in the picture:
Press OK (34).
Now push your way back to your inbox and restart the Outlook program.
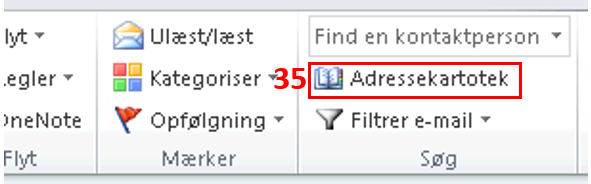
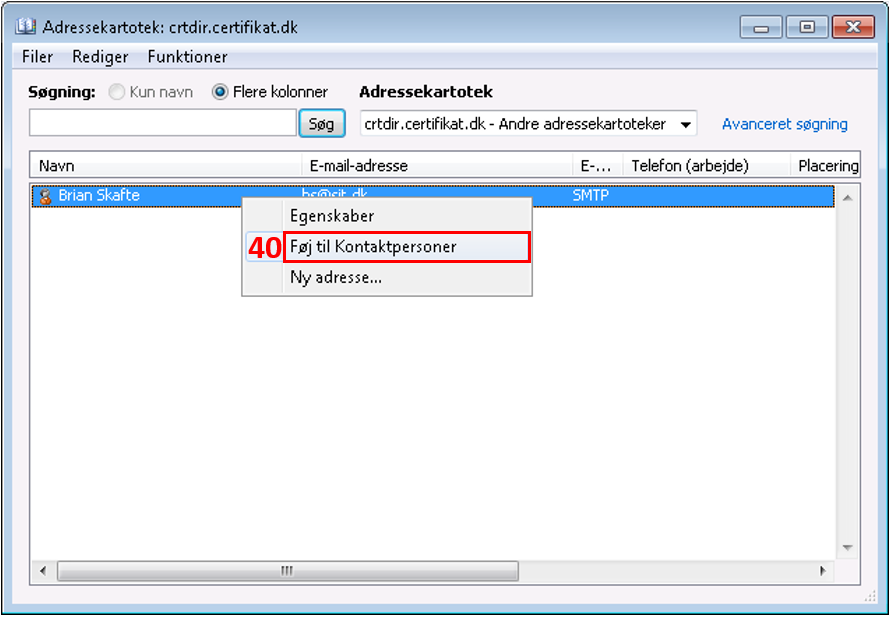
To find a user in Nets' central address book, first select Address Book at the top of the Outlook window.
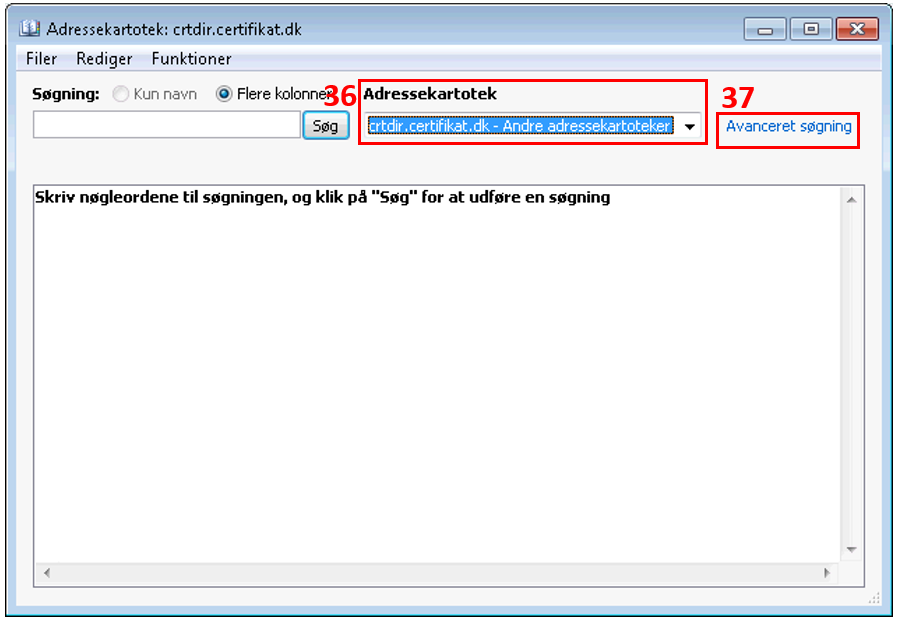
In the drop-down menu Address Book make sure that the central address book is selected (crtdir.certifikat.dk). It will typically be at the bottom of the list. Then press Advanced Find (37).
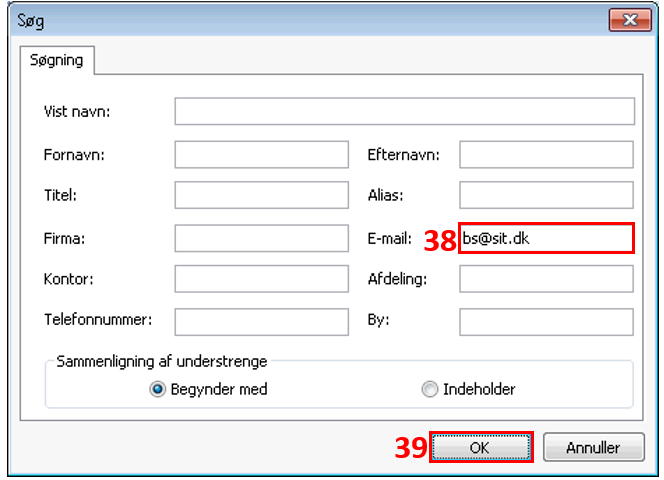
Enter the email address of the person you want to find (38) and press OK (39).
Notice You cannot use other search fields.
When you have found the desired recipient, right-click on the search result and press Add to Contacts (40).
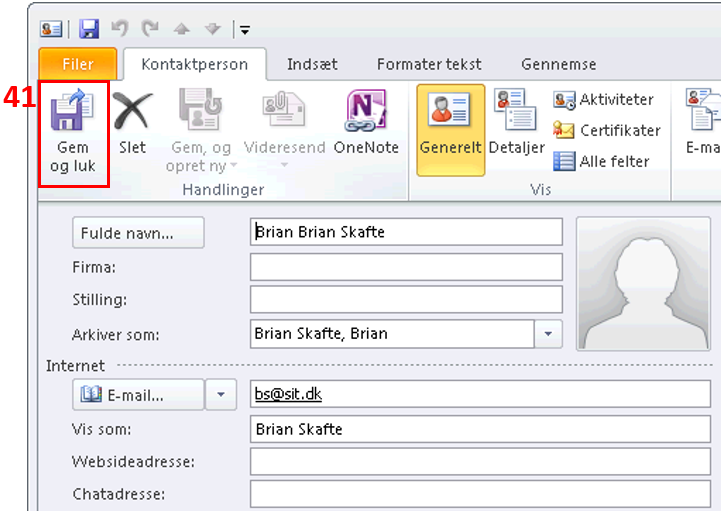
Save the contact by pressing Save & Close (41).
If the contact is already in the contact list, the contact must be updated. Press the button Update (42).
The recipient's certificate is now stored in your address book and you can send secure encrypted mails to them.
