How do I approve (whitelist) and block (blacklist) emails in Microsoft spam filter?
The spam filter at Microsoft protects your inbox from spam and malware.
Emails captured by the Microsoft spam filter will appear in the Spam folder in your inbox and will be deleted automatically after 10-30 days. Remember to visit the Spam folder once in a while.
How to approve (whitelist) a sender
If a "good" email from a sender you trust appears in the Spam folder, you can choose to approve the mail sender.
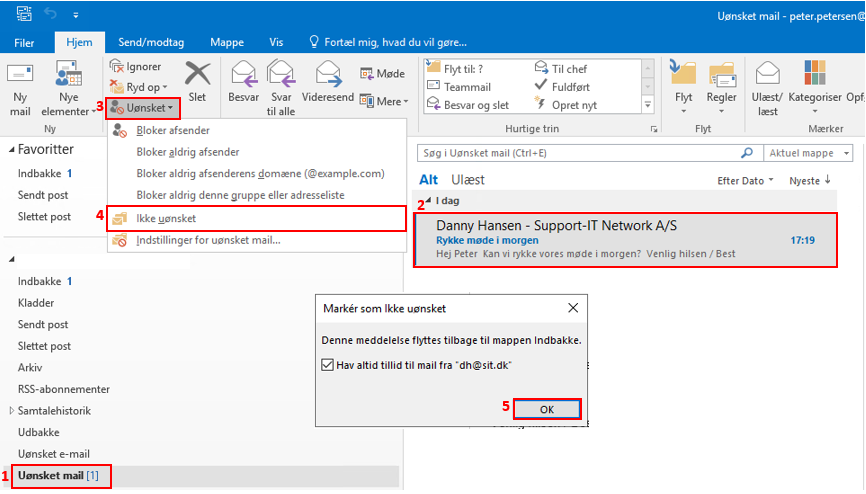
- Open the folder Spam folder (1) in your inbox
- Mark the email you want to approve (2).
- In the main menu, select Spam (3)
- Select Not spam (4) in the submenu
- Select OK (5)
The sender is now approved and should not appear in the Spam folder again.
How to blick (blacklist) a sender
If a spam mail gets through the spam filter to your inbox you can choose to block the mail sender.
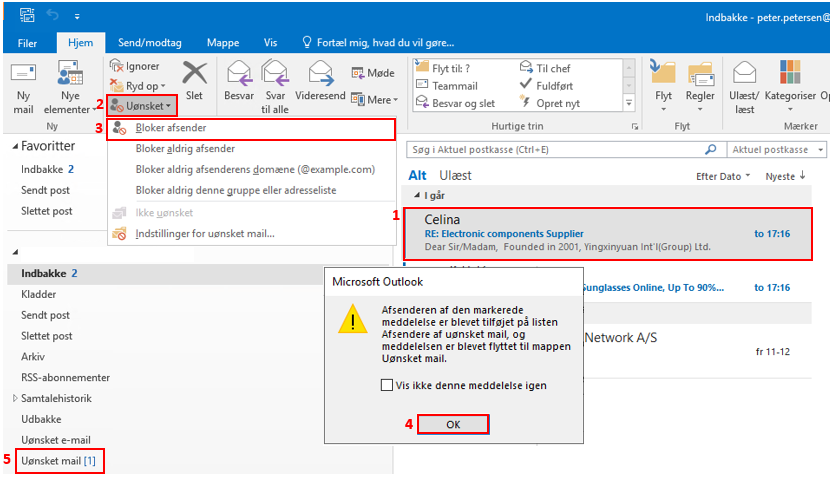
- Mark the email you want to block in your inbox (1).
- In the main menu, select Spam (2)
- Select Block sender (3) in the submenu
- Select OK (4)
- The blocked spam mail is now moved to the Spam folder (5).
Ret indstillinger for din Microsoft spamfilter
Hvis du ønsker at rette i indstillingerne for dit spamfiler, eksempelvis hvor høj beskyttelsesnieauet skal være, skal du gøre følgende:
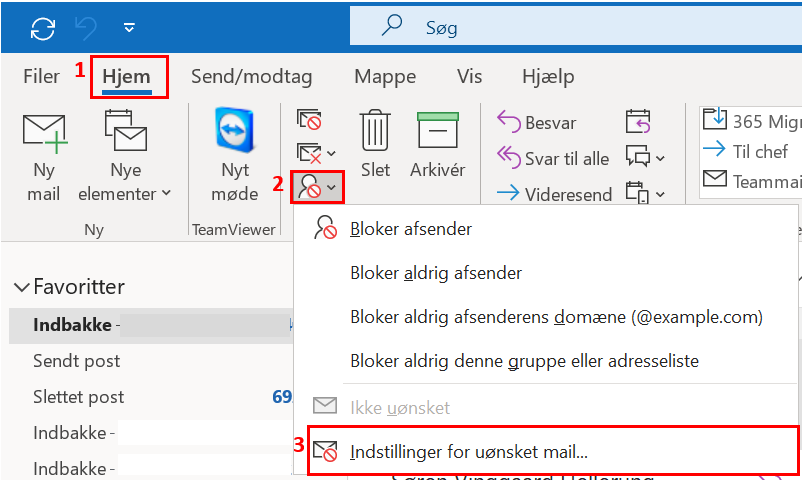
Klik på fanen Home (1).
Select Spam (2) og derefter Indstillinger for uønske mail…(3).
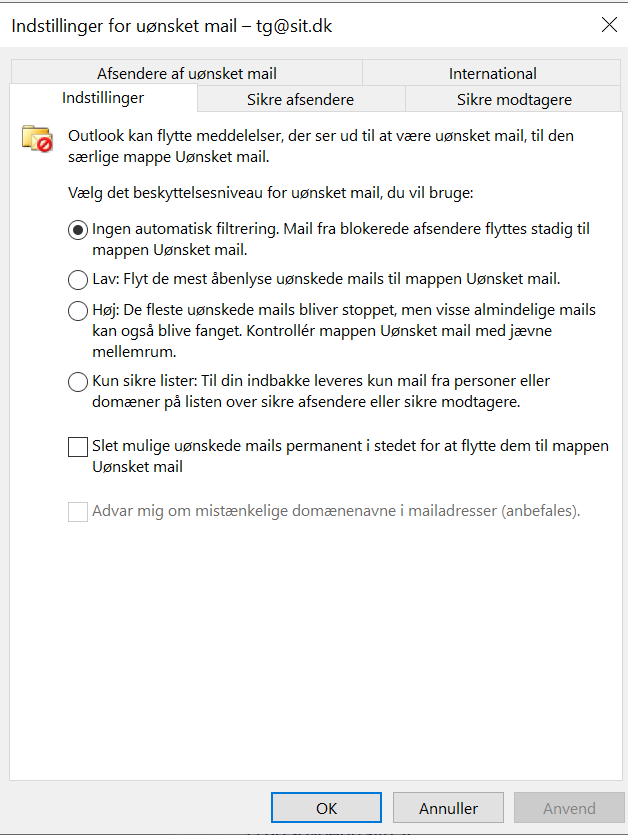
Under fanen Settings kan du sætte kriterier for, hvor grundigt din spamfilter skal sorterer dine mails.
Det kan være en god idé at vælge “Lav:” for at undgå at for mange ikke-spam mails bliver leveret til mappen Uønsket e-mail.
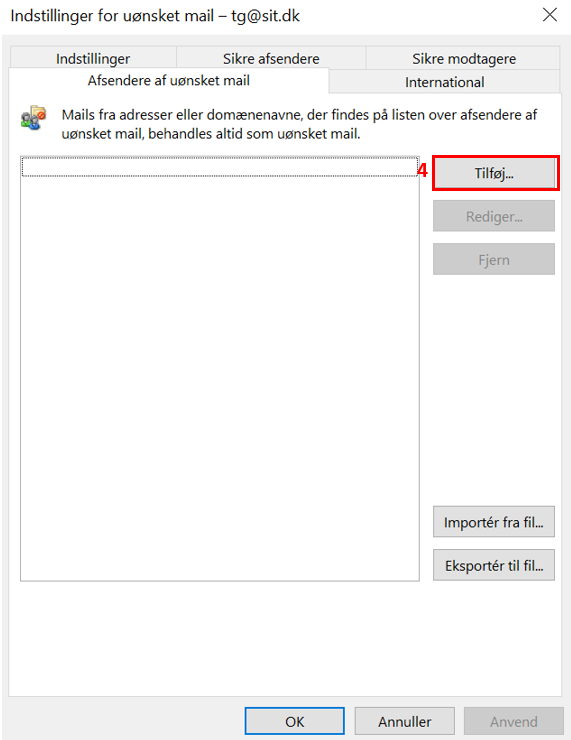
Under fanen Afsendere af uønsket mail kan du tilføje afsendere du helt ønsker at blokere.
Click on Add (4) og indtast den mailadresse du ønsker at blokere.
Ønsker du at blokere alle mails fra et helt domæne, skal du indtaste domæne, dvs. alt det der kommer efter @ i en mailadresse.