How do I send secure email through Net's employee signature using key file?
Send Secure Email (Encryption)
Open a new email.
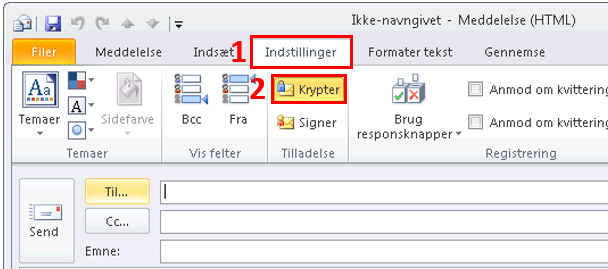
If you want to encrypt the e-mail so that only the recipient can read the content. then choose Settings under the tab (1) mark Encrypt (2). Encryption requires that you have the recipient's certificate in your address book or retrieve the recipient's certificate when sending the mail.
When choosing the recipient, you can either use the contact from your address book where you saved the certificate, or search for a new one without saving the recipient in the address book.
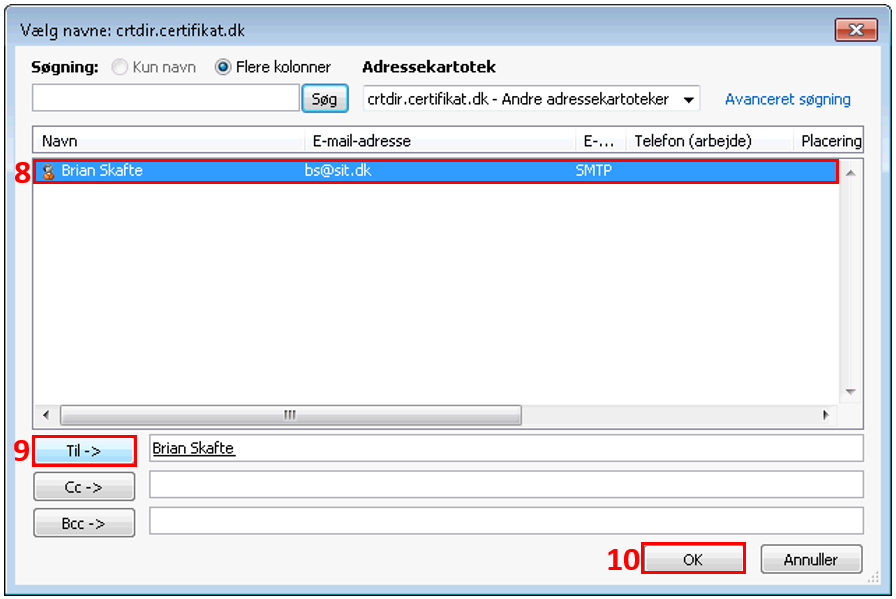
To search and select a new recipient, press To (3).

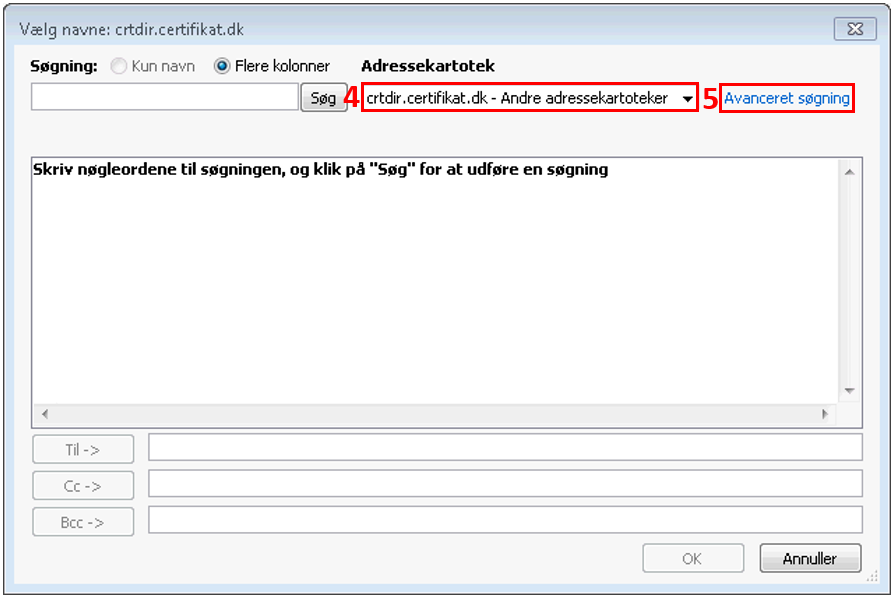
Select crtdir.certifikat.dk (4) in the address book list (this is usually at the bottom) and then press Advanced Search (5).
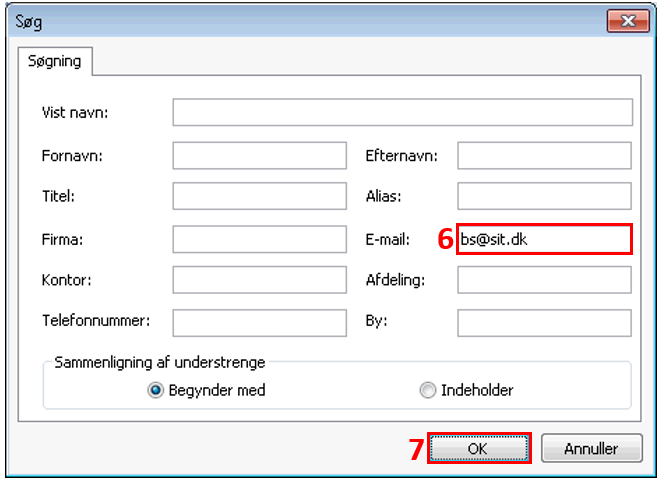
Enter the recipient's email address in E-mail field (6) and press OK (7).
Notice You cannot use other search fields.
Highlight the correct receiver (8), press To -> (9) and press OK (10).
Press the button Send (11).
The mail will now be sent to the recipient.

Send Secure Email (signing)
Open a new email.
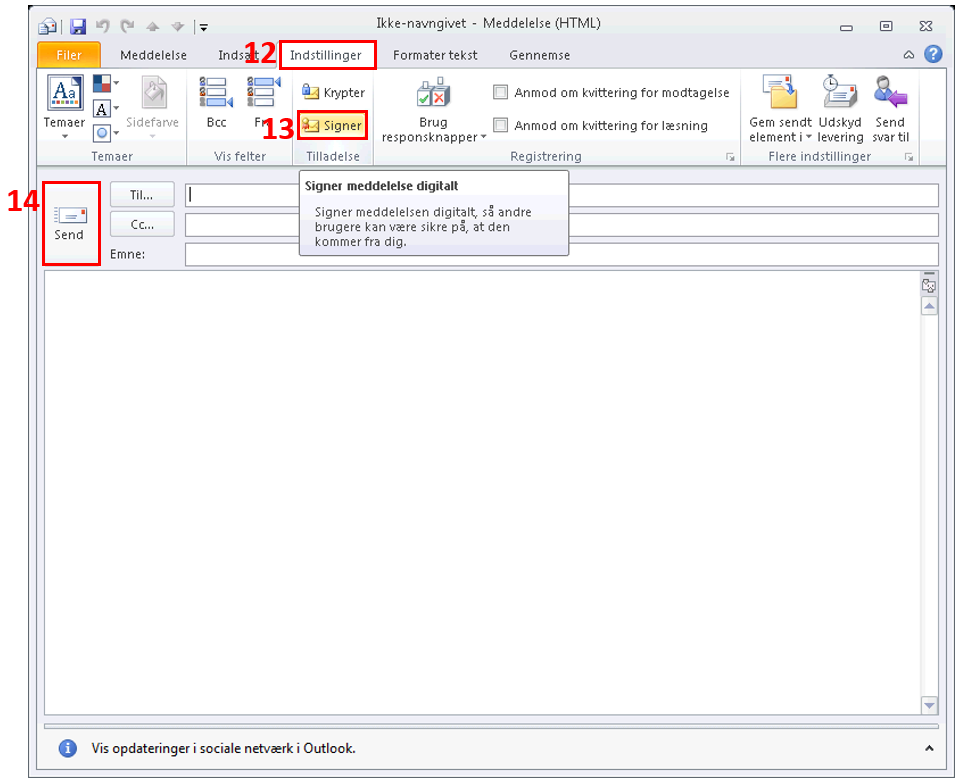
You can choose to sign your email by selecting the tab Settings (12) and mark Sign (13) as shown in the picture, so that the recipient can see thats you there are the sender of the mail.
When you have written the mail, press Send (14). Note that it may take a moment before the next image is shown.
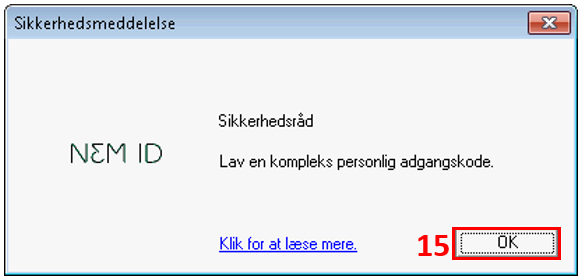
After pressing Send you can receive a safety advice where you need to press OK (15).
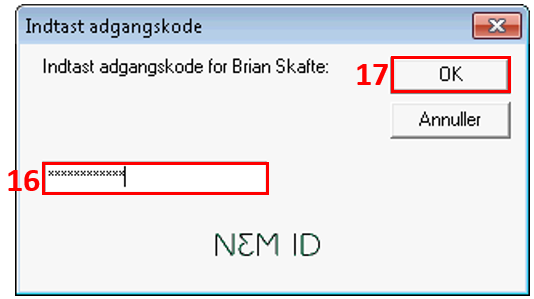
Enter your employee signature password (16) and press OK (17).
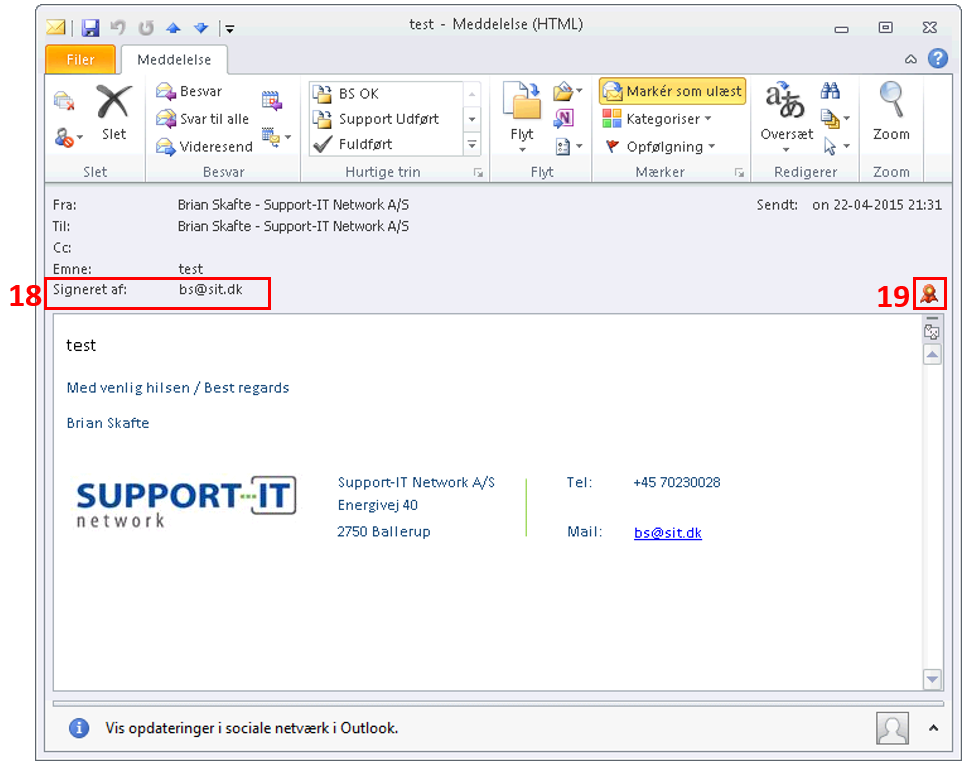
The mail is now sent to the recipient, and now the recipient can see that you have sent the mail with the signature as security for this (18).
Recipient has the option of pressing the small seal on the right side (19) to see details of the certificate.