How do I setup my Microsoft 365 mail in my iPhone mail app (iSO 11)?
Microsoft 365 email is Microsoft's email solution delivered directly from Microsoft's own cloud.
Go to Settingsand choose Mail > Accounts.
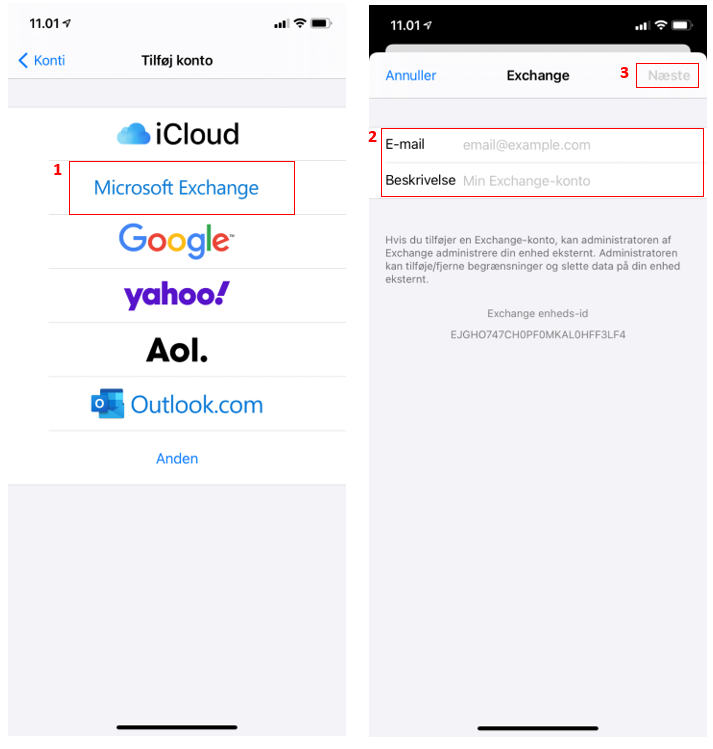
Press Add account, and select Microsoft Exchange (1). Fill out the form with email address and description (2). Please enter the email address in the description as well. This makes it easier if you've added multiple accounts
Press Next (3).
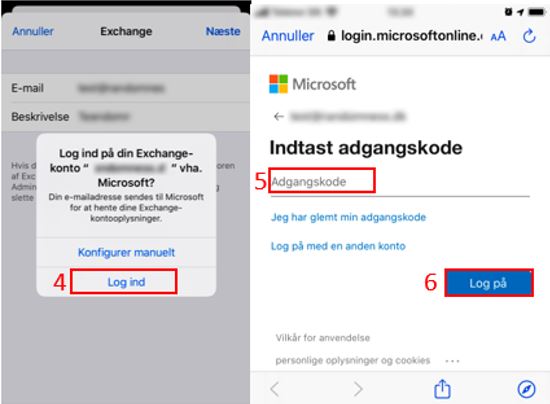
Select Sign in (4)
Enter your password for your email account (5) press Sign in (6)
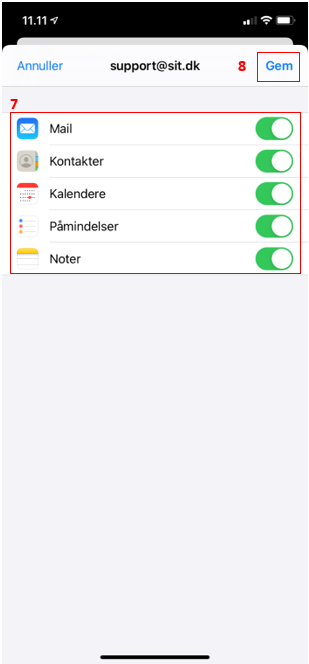
Specify which services you want to synchronized to your phone (7).
Press Save (8) when you are through.
Your email account is now ready to use.
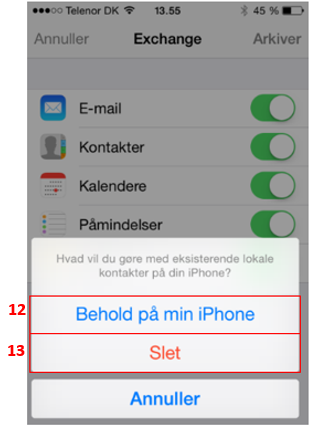
If you choose to sync contacts and there are contacts on your phone already, you will be asked if you want to keep them or delete them.
If you choose to keep them (12), you will be notified that you risk getting more of the same contact.
If you choose to delete them (13), you will be notified that your exsisting contacts will be deleted from your phone.
MAIL
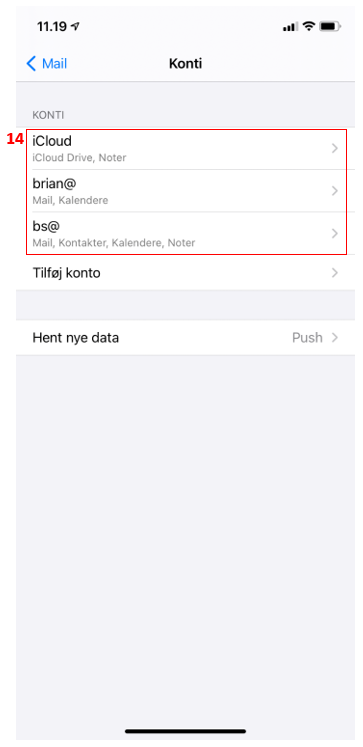
If you want to expand the limit of how long mails will be synchronized, this can be changed in the settings
Press Settings and select Mail. Choose Accounts and choose the account which settings you want to change (14).
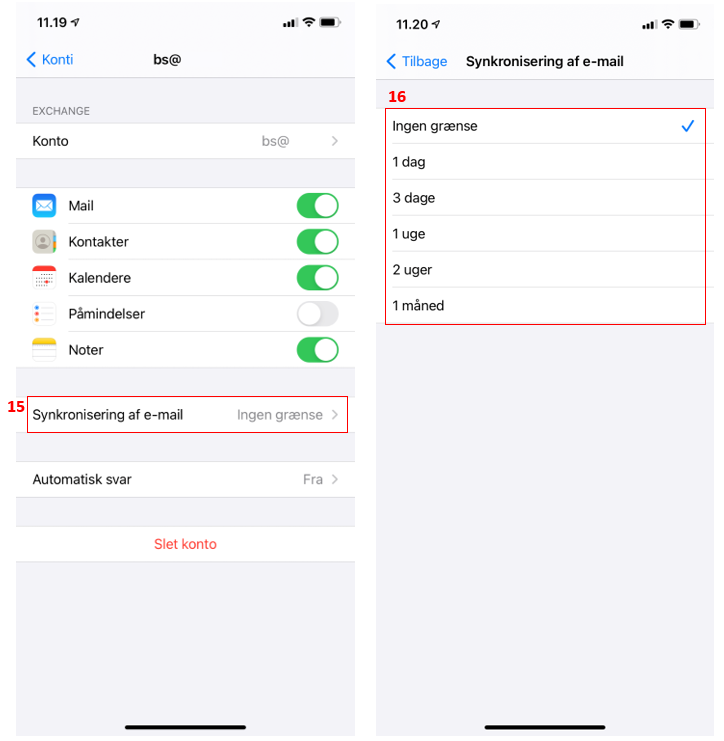
Press Synchronize e-mail (15) and select the period to synchronize (16).
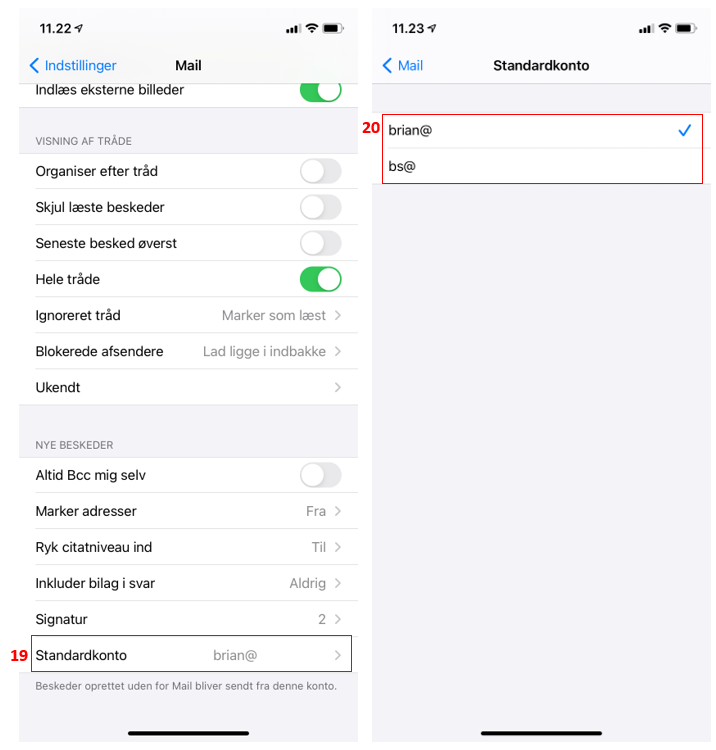
Email signatures can be entered under Signature (17), where you can choose whether the email signature should be used for all accounts or only one account (18).
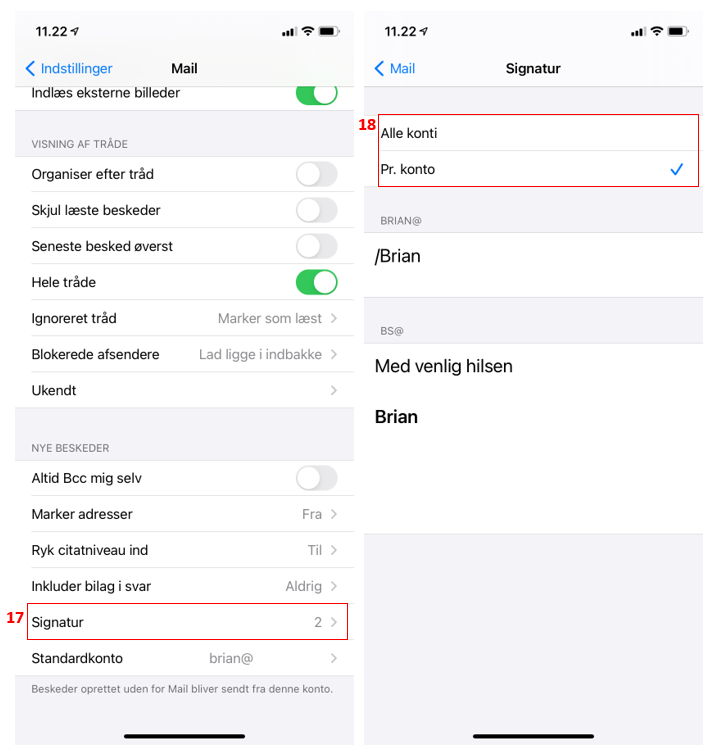
Under Standard account (19) you can choose a default account to send from (20).
CONTACTS
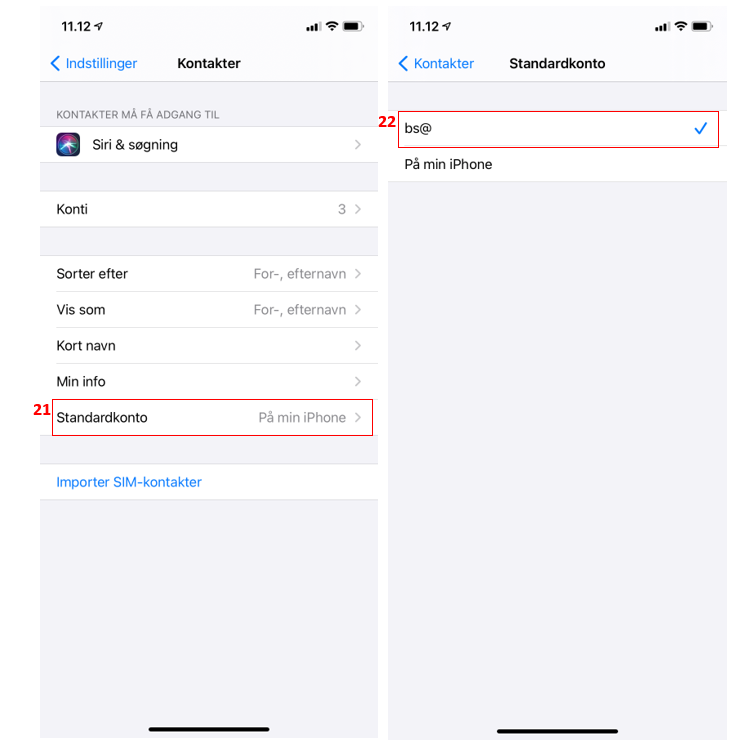
If you want contacts created on the phone to be automatically created in the mail account / Outlook too, the new mail account must be selected as default for Contacts.
Press Settings and select Contacts. Choose Standard account (21). Under Standard account choose your new mail account (22).
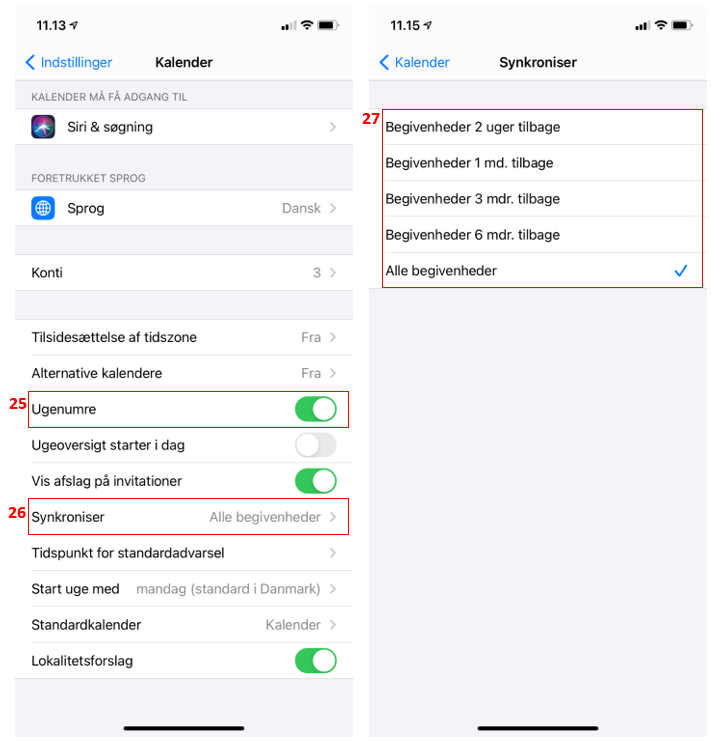
CALENDAR
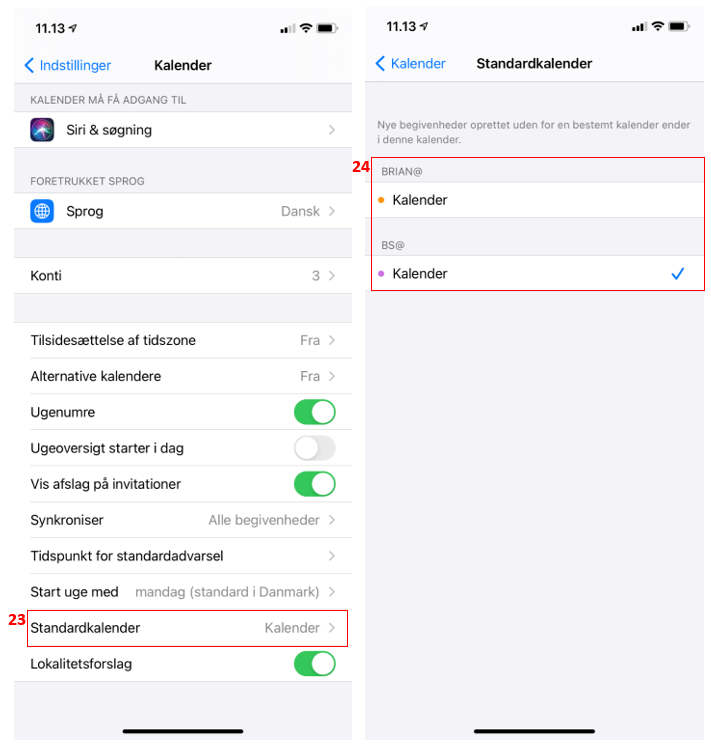
If you want calendar appointments created on the phone to be automatically created in the mail account / Outlook too, the new mail account must be selected as default for Calendar
Press Settings and select Calendar. Choose Standard calendar (23). Under Standard calendar Choose your new mail account (24).
In calendar settings you can choose to view week numbers (25) and choose how long to synchronize events (26 + 27).